Introduction
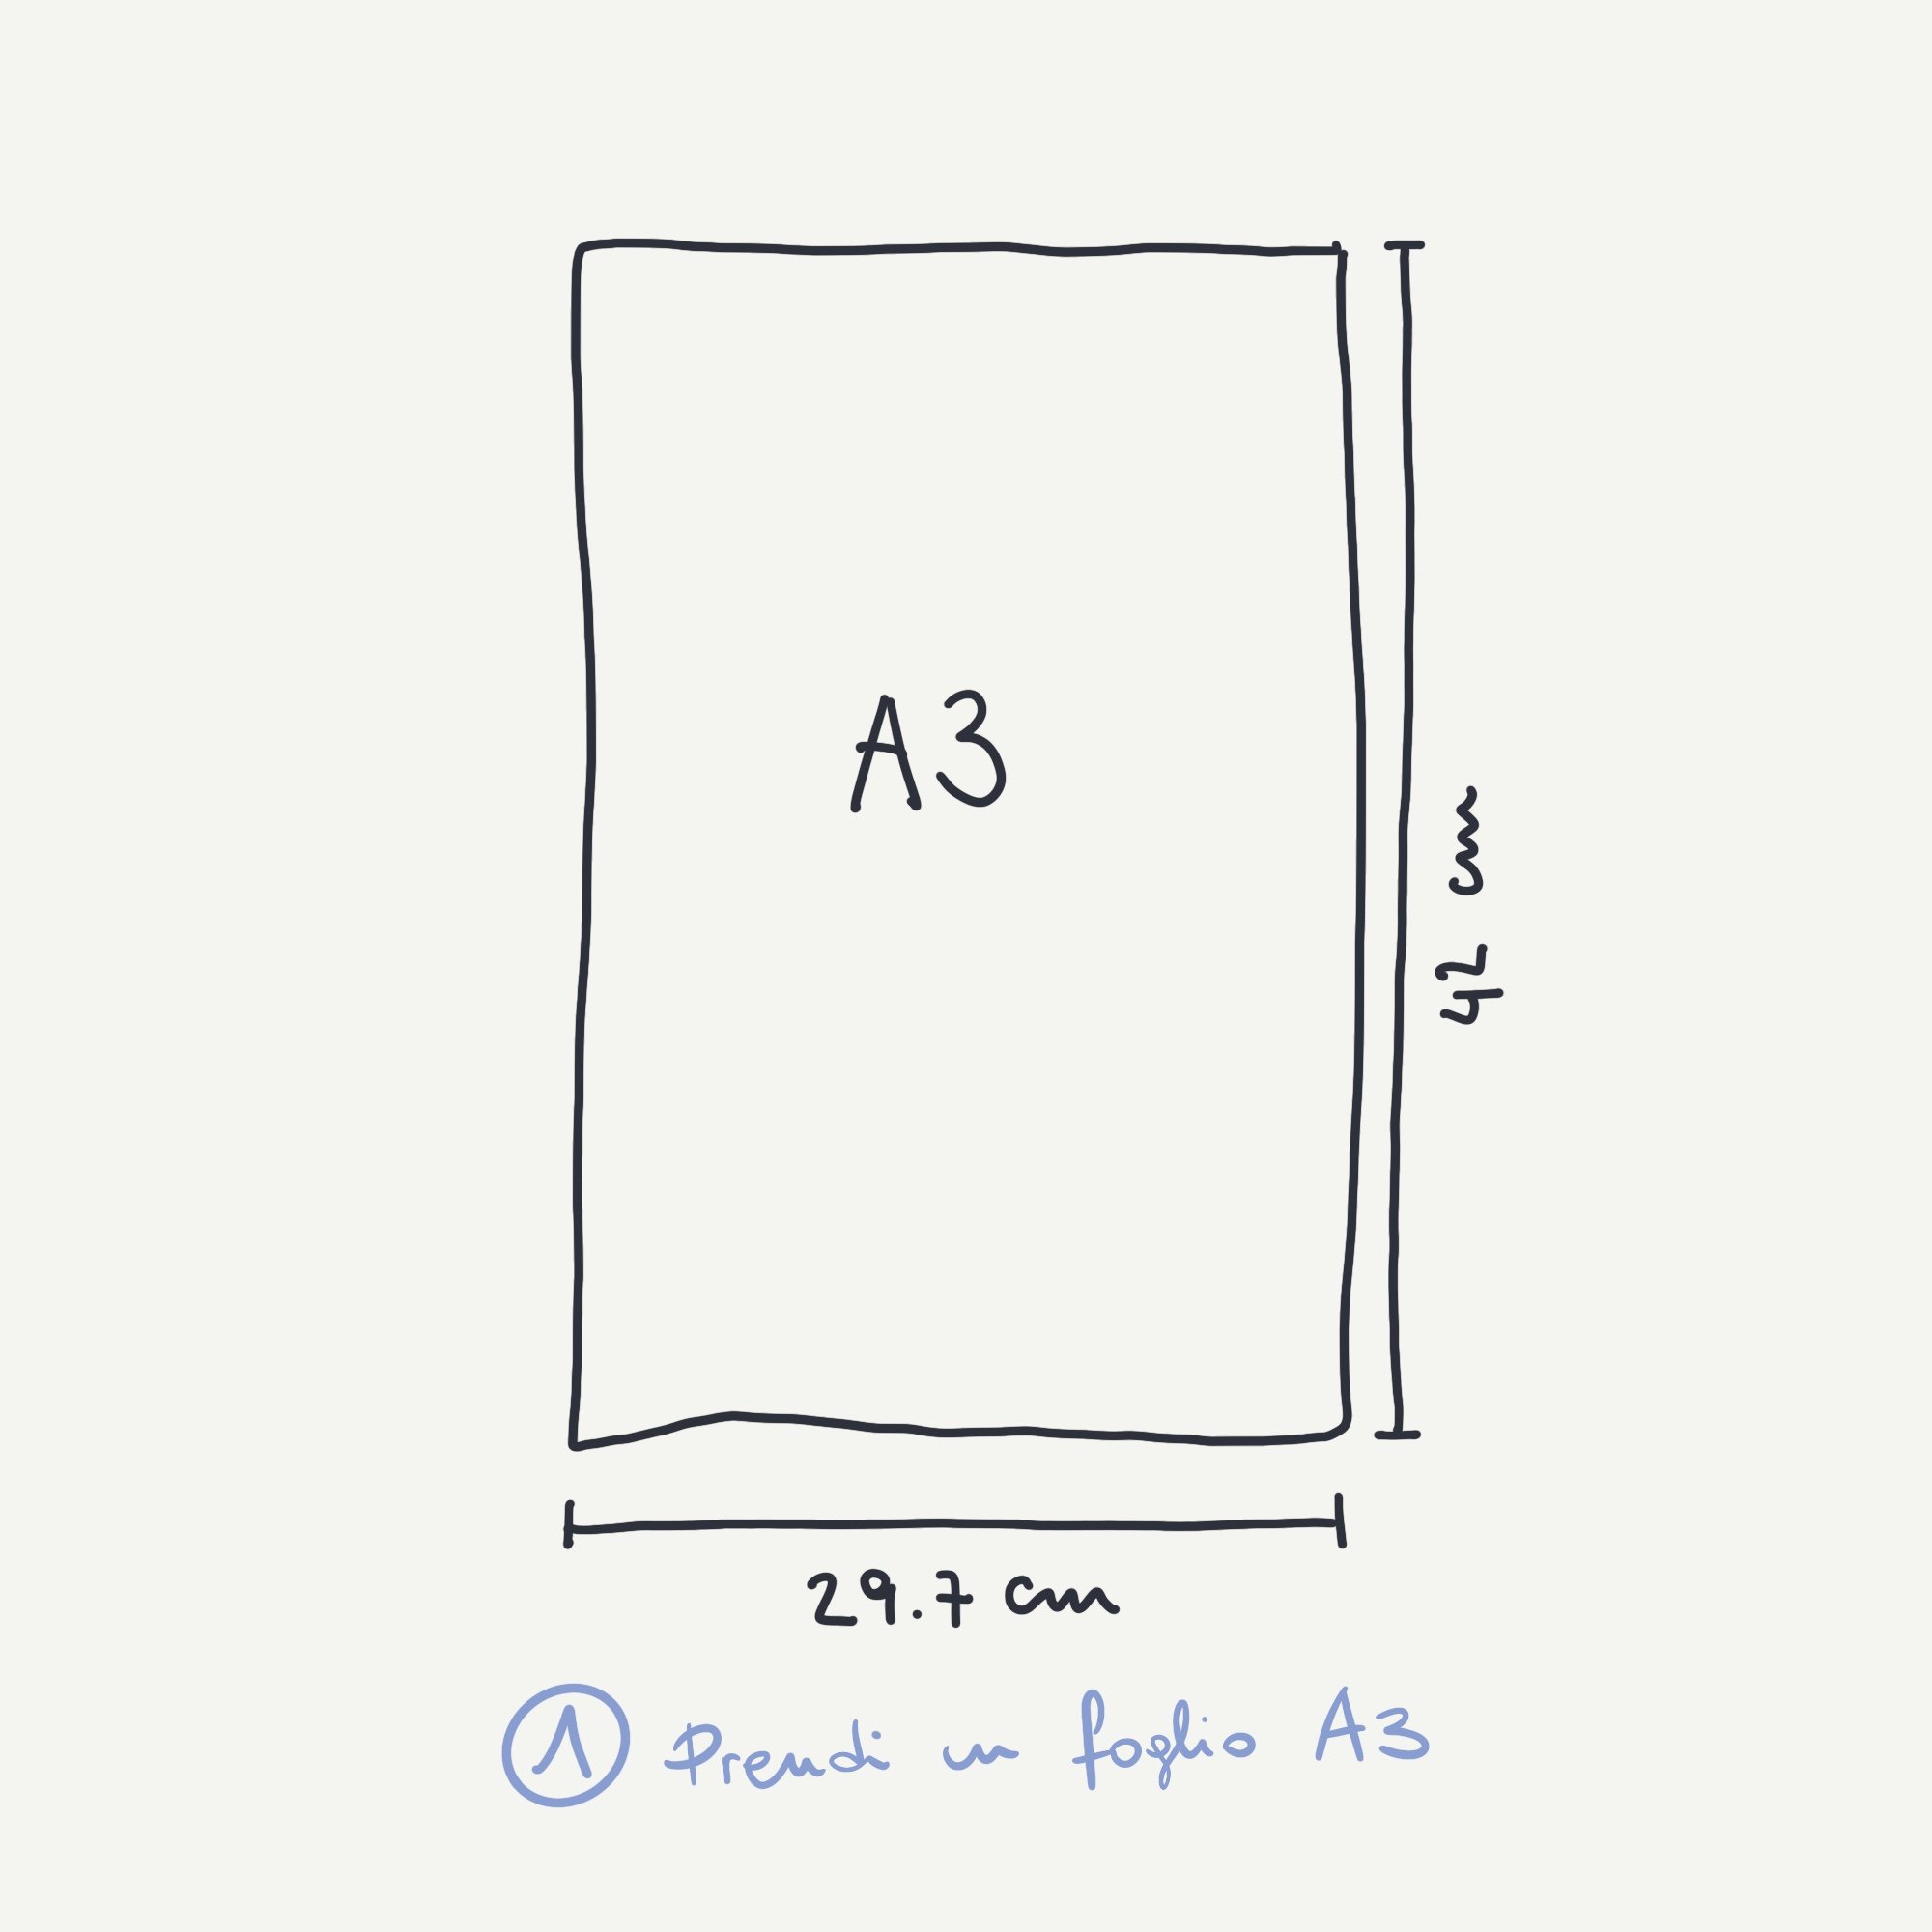
Looking for a creative and fun project you can do with just a sheet of paper? Look no further! In this tutorial, I will show you how to create a mini book without doing complicated steps like sewing or gluing, but just folding and cutting an A3 sheet. With just a few simple steps, you can turn a simple piece of paper into a lovely little art book.
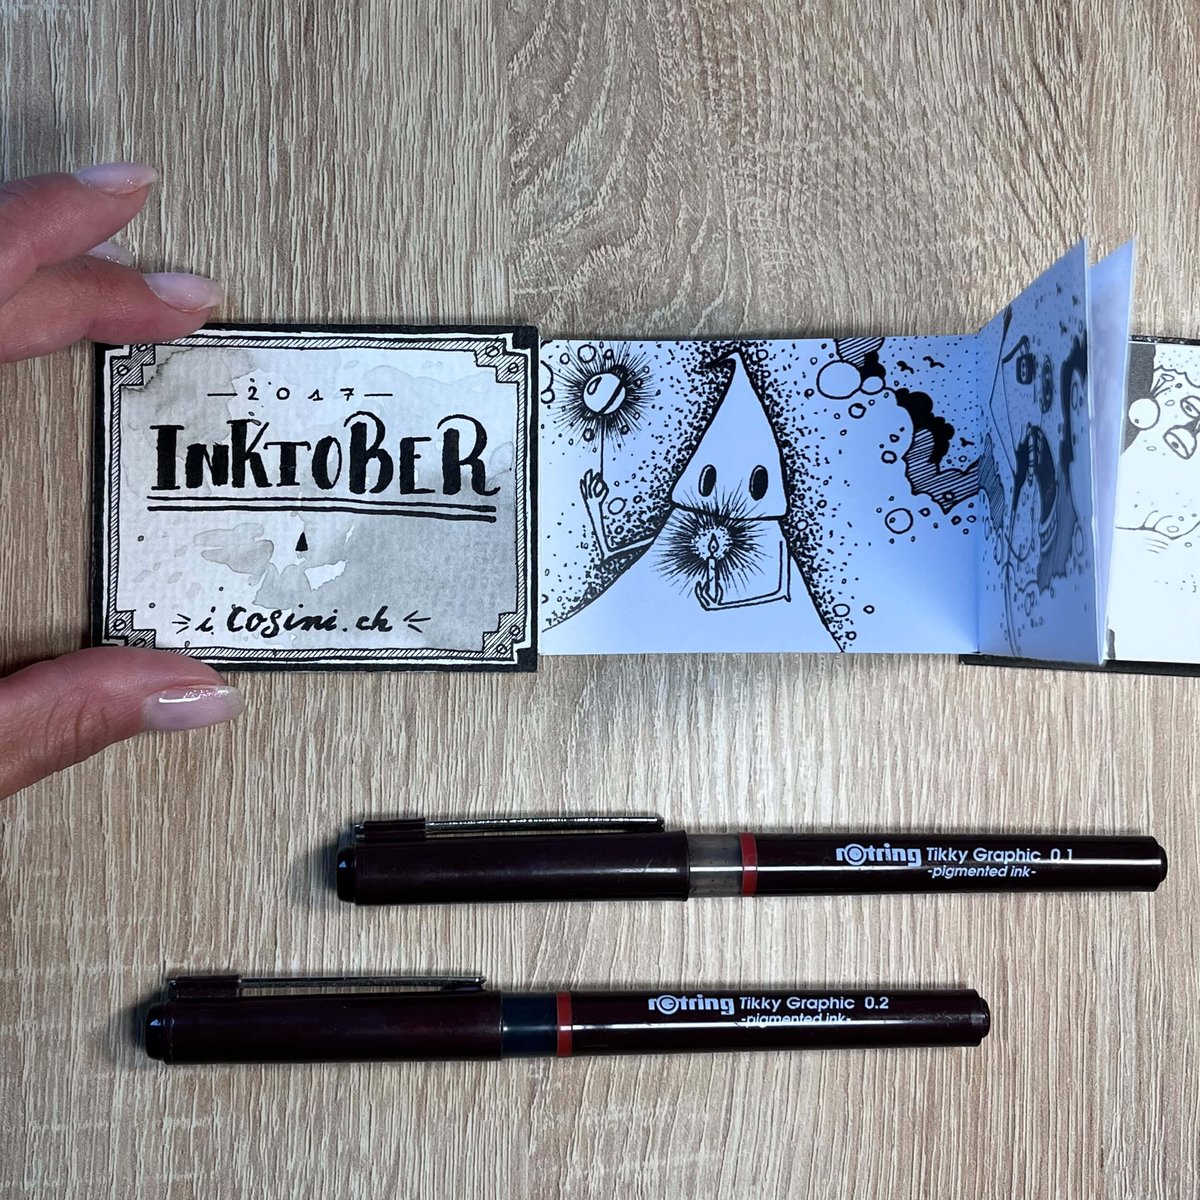
The first time I made such a mini-book was to participate in Inktober in 2017. Inktober is a challenge to oneself to make a drawing every day for the month of October. The result is a series of 31 drawings in which, by drawing each day, a technique was perfected and trained (for the inventor of this challenge, the American illustrator Jake Parker, it was the technique of 'inking', which is the step of creating the lines with ink in an illustration).
But let's not waste any more time: let's get started!
Material:
- A3 sheet of paper
- ruler and pencil
- scissors or cutter
- cardboard or slightly thicker paper
- glue
- drawing or writing material
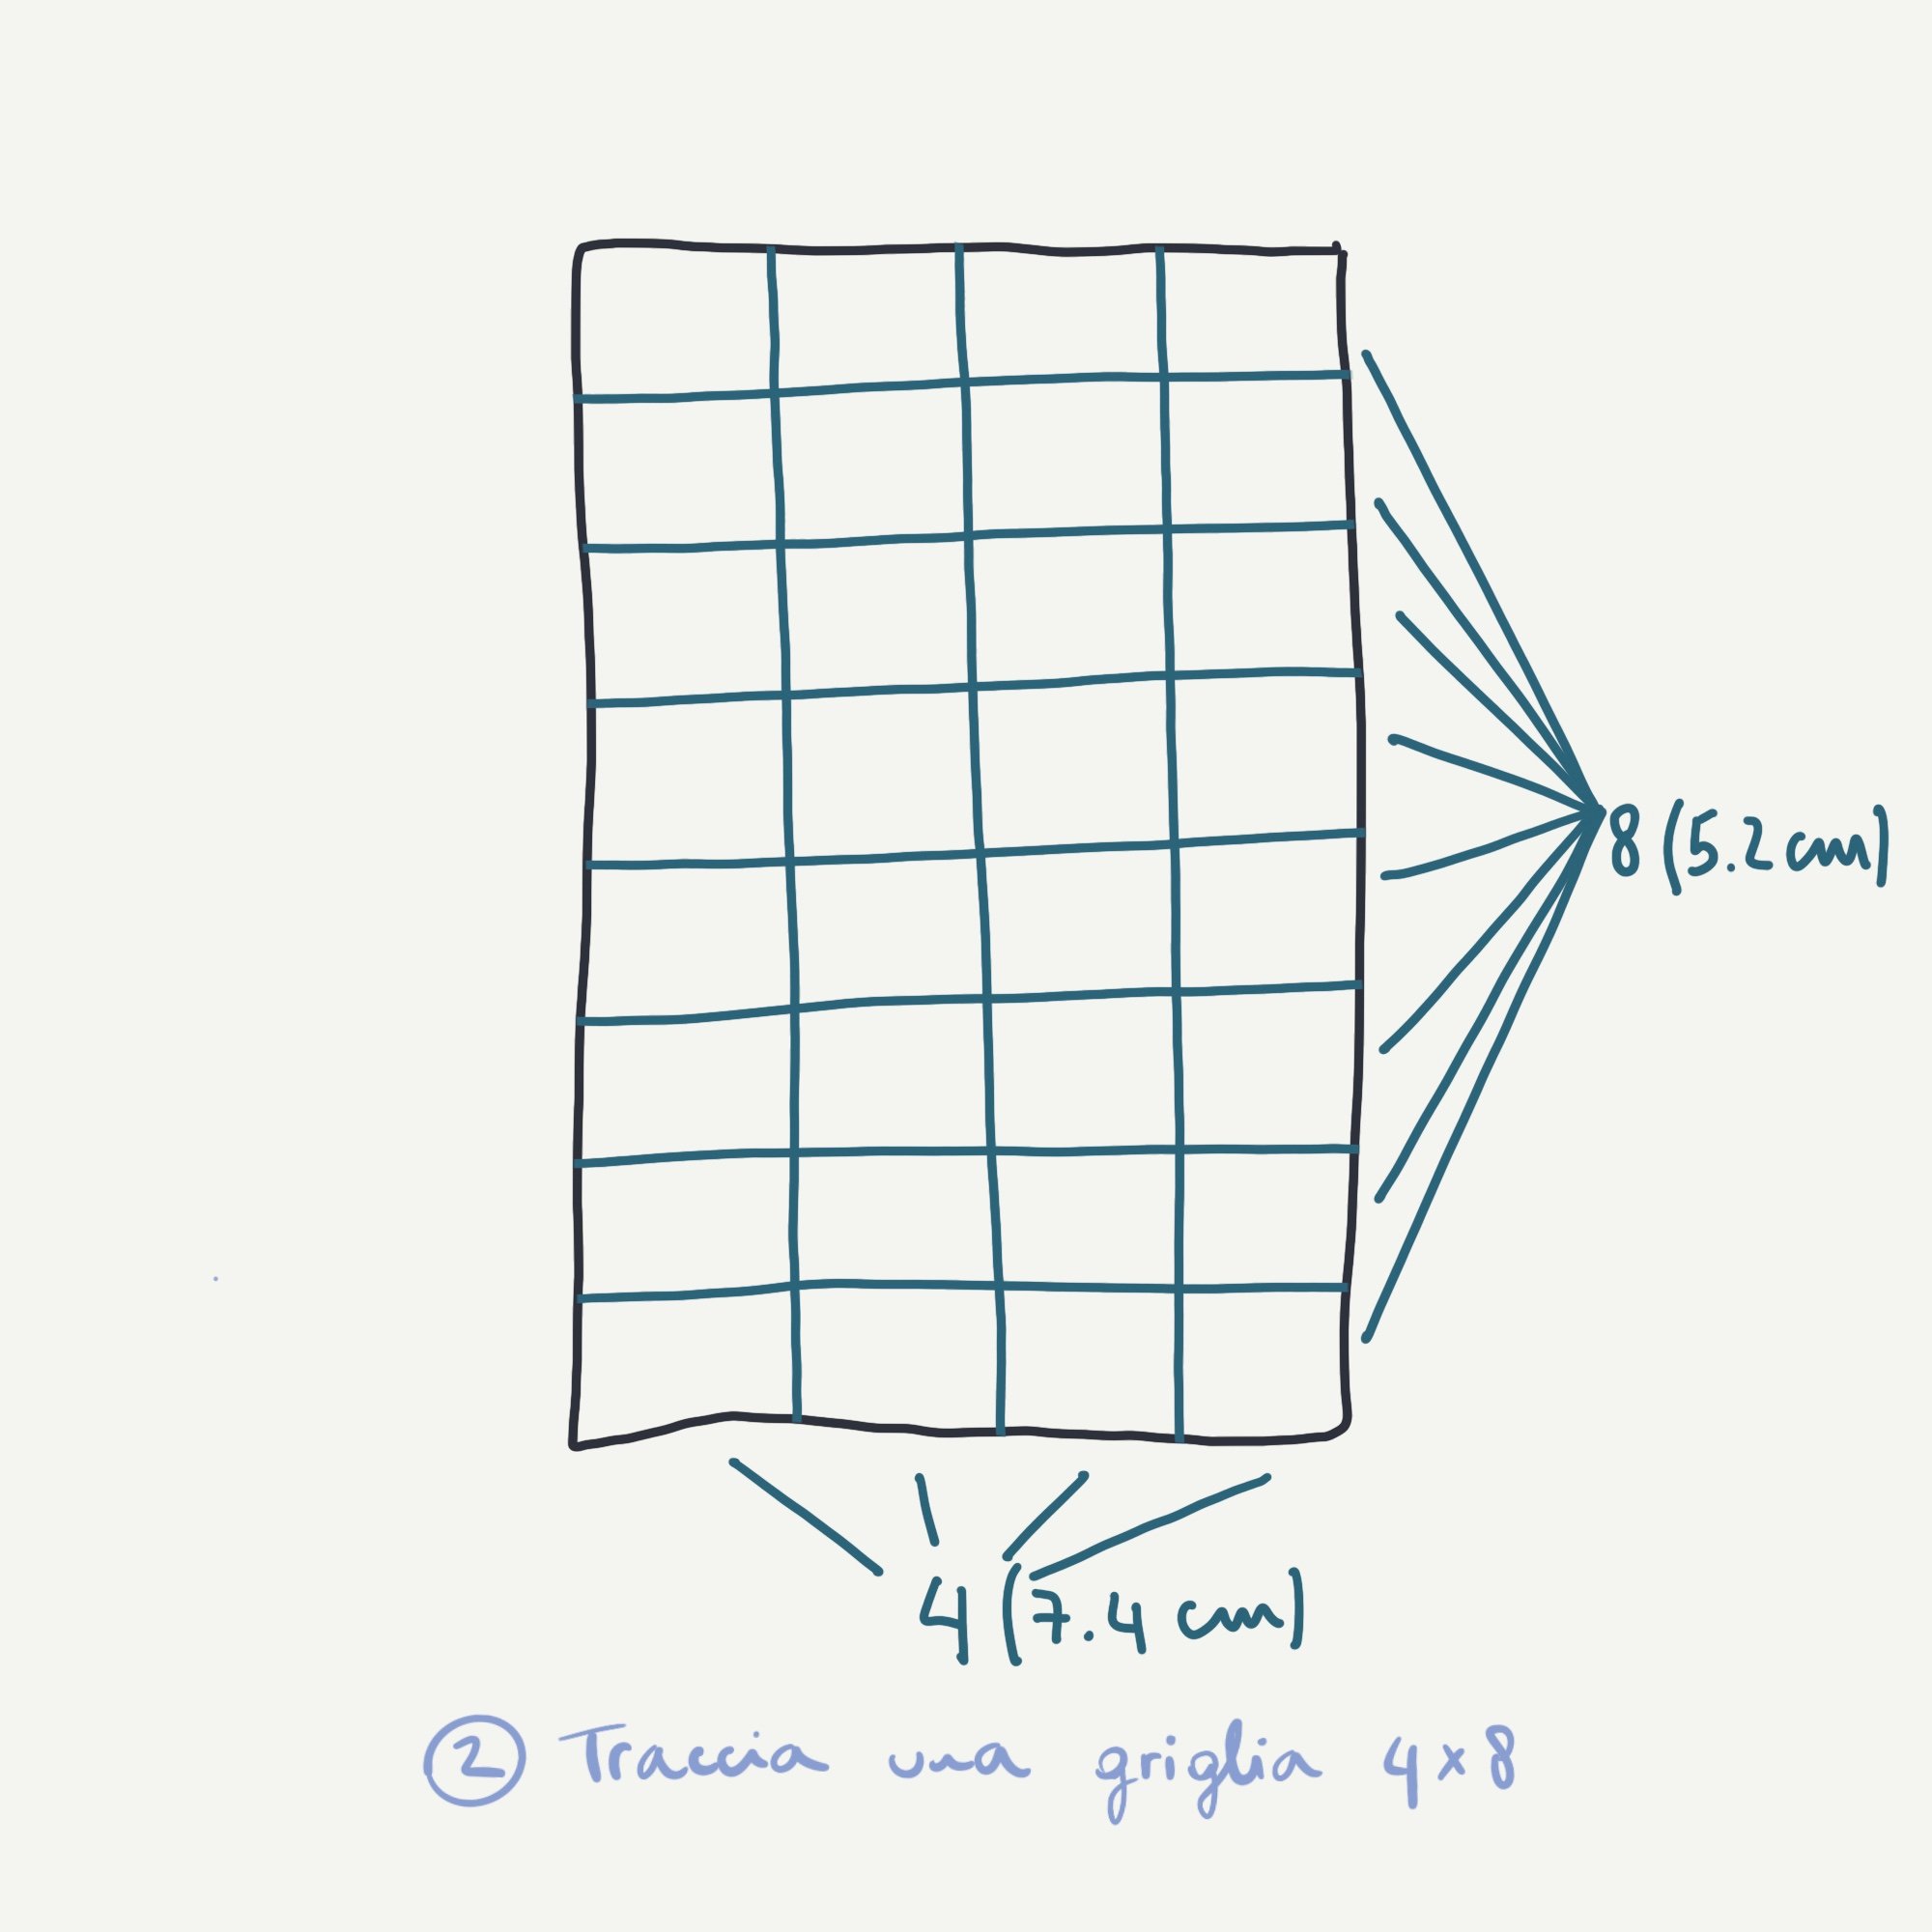
Step 1: The starting grid
The first step in creating your mini-book is to divide the A3 sheet into a 4x8 grid. To do this, use a ruler and pencil to draw lines: these must be 5.2 cm apart on the long side (thus creating eight sections) and 7.4 cm apart on the short side (thus creating four columns). The grid shows the 32 pages that the booklet will consist of.
Tip: If you don't have a ruler and pencil, or this kind of activity is not your forte, you can create the grid by folding the sheet; folding it in half, then in half again, you will get the 4x8 grid with the different folds.
Step 2: Fill the grid with drawings
To make it more appetising, I made some random ink spots on the A3 sheet. I did not pay attention to the grid, but simply arranged these spots randomly. At this point, one rectangle at a time, I will make up the different pages with a small drawing.
Attention: the even rows of the grid will be upside down in the final booklet! In diagram 3 you see how the pages will be arranged in the booklet. Turn the sheet over and continue drawing, filling in all the rectangles.

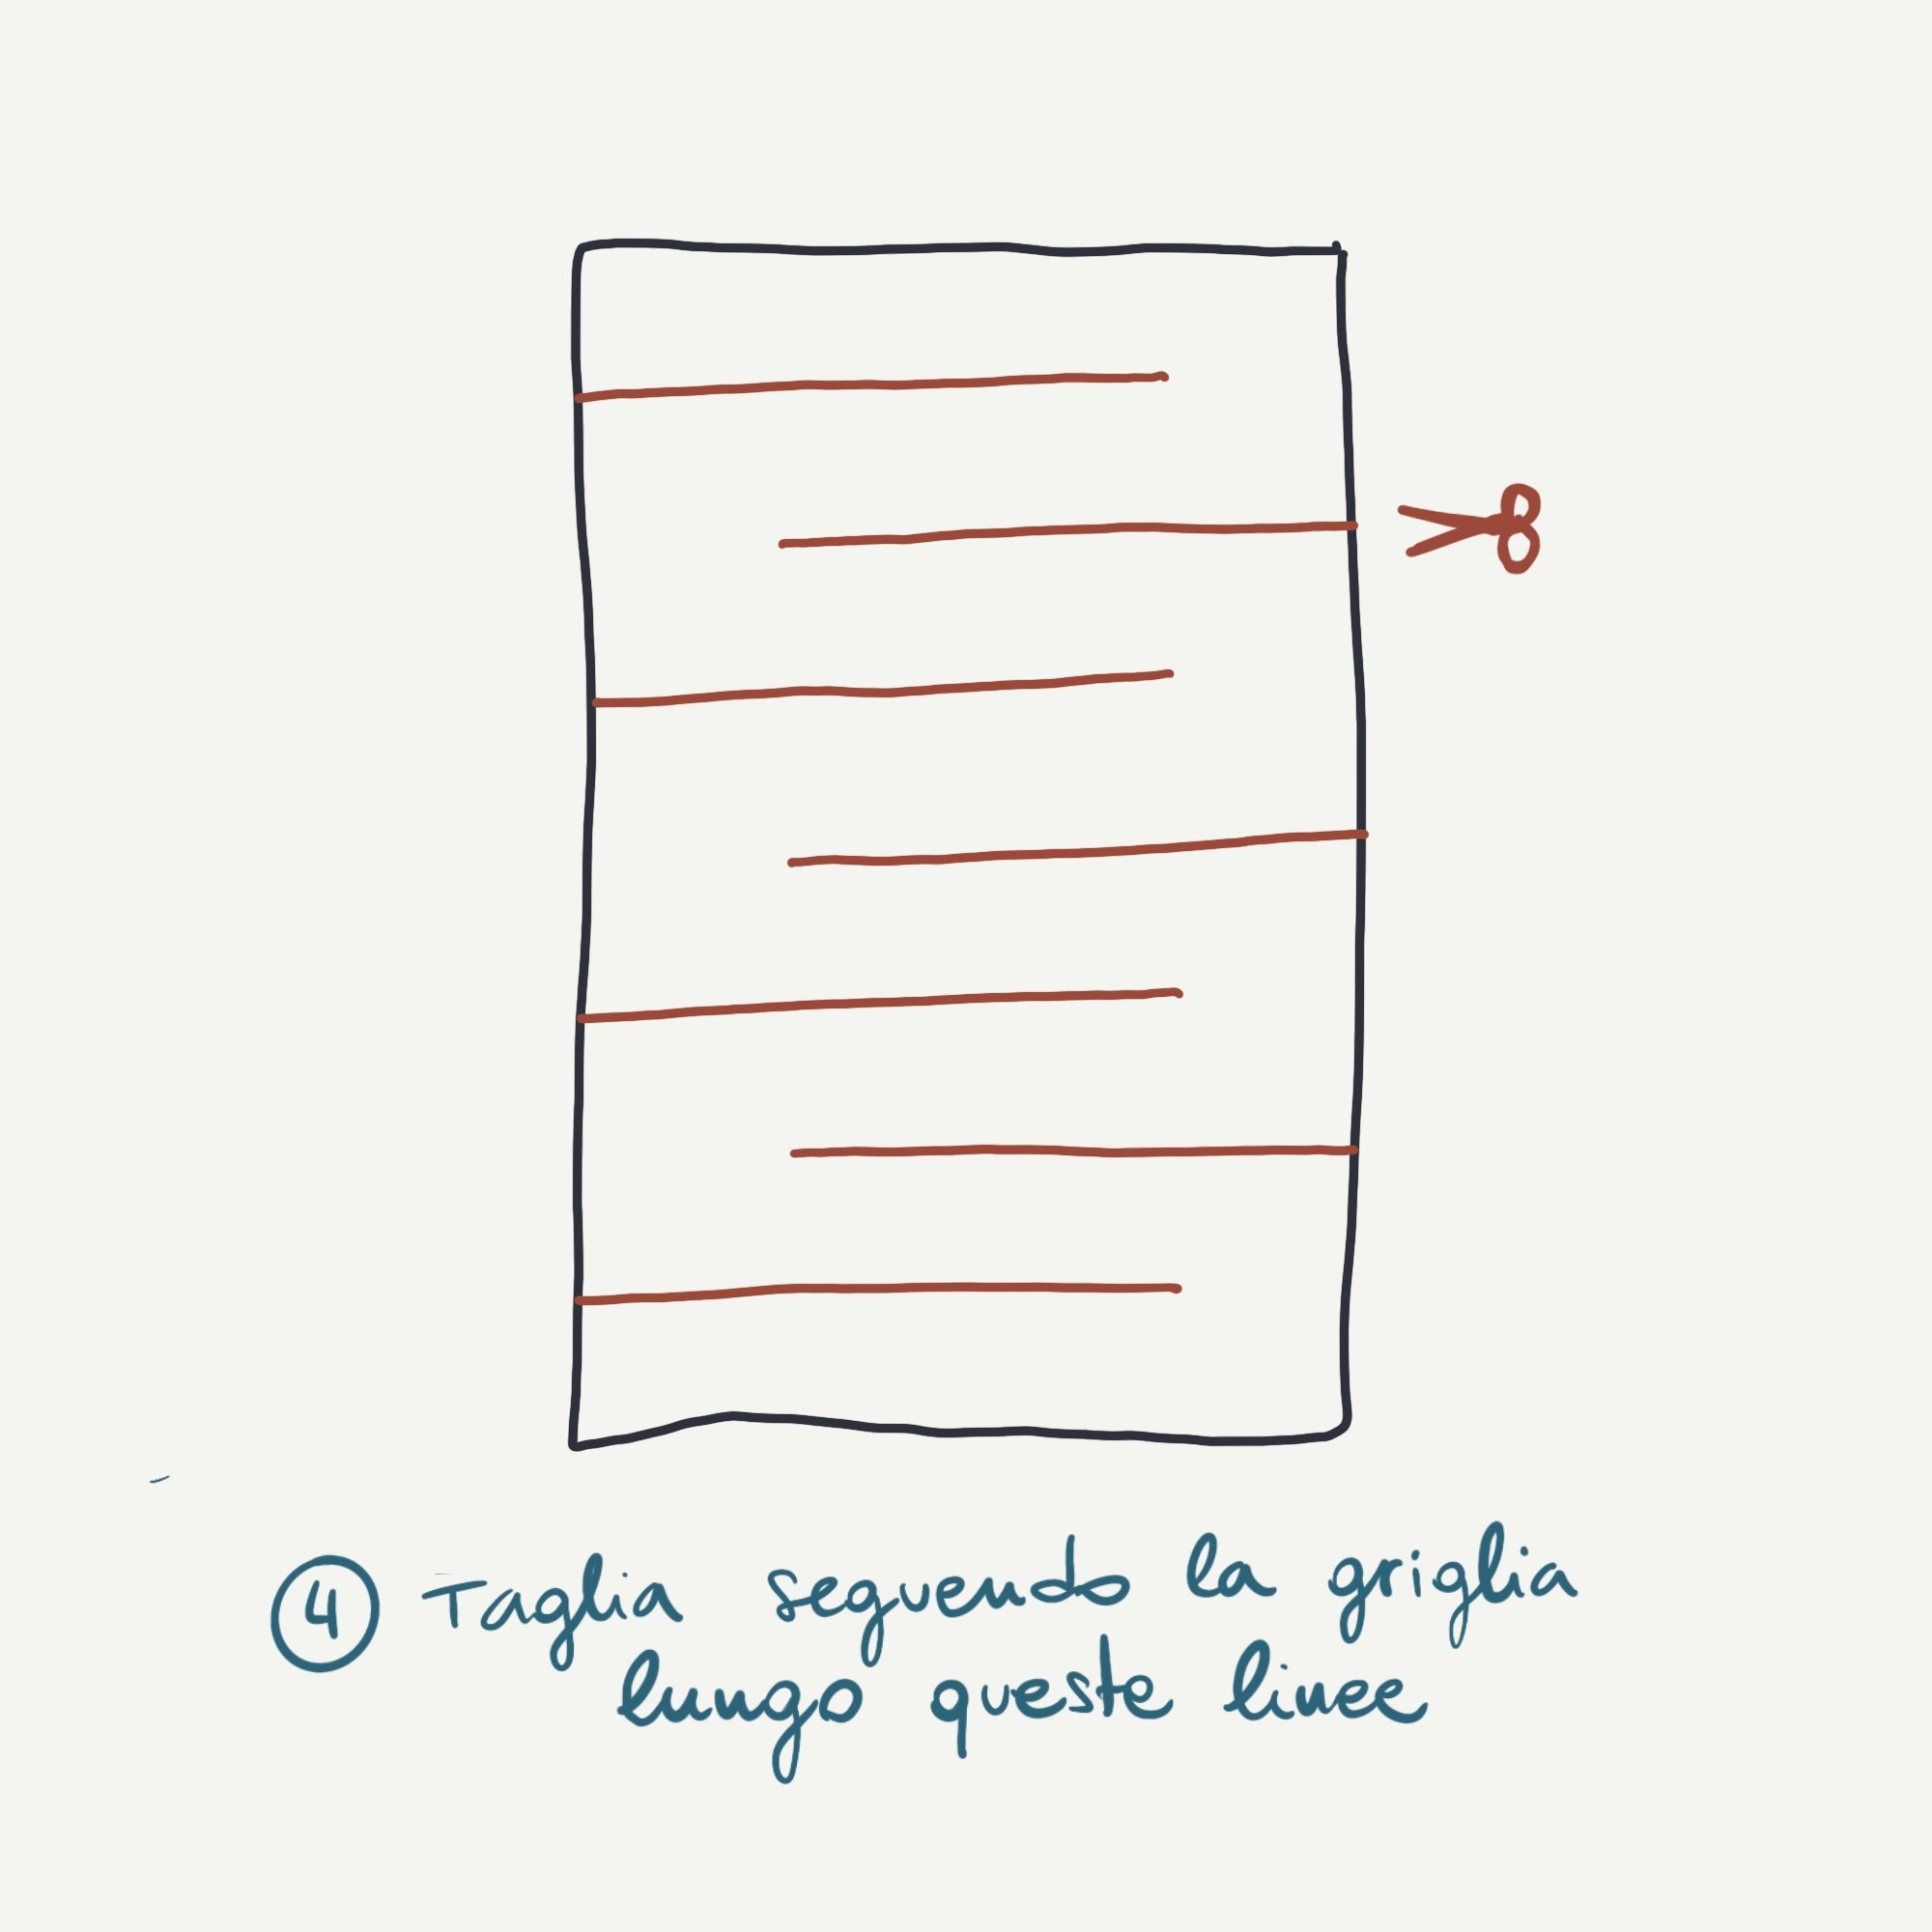
Step 3: Cut and Fold
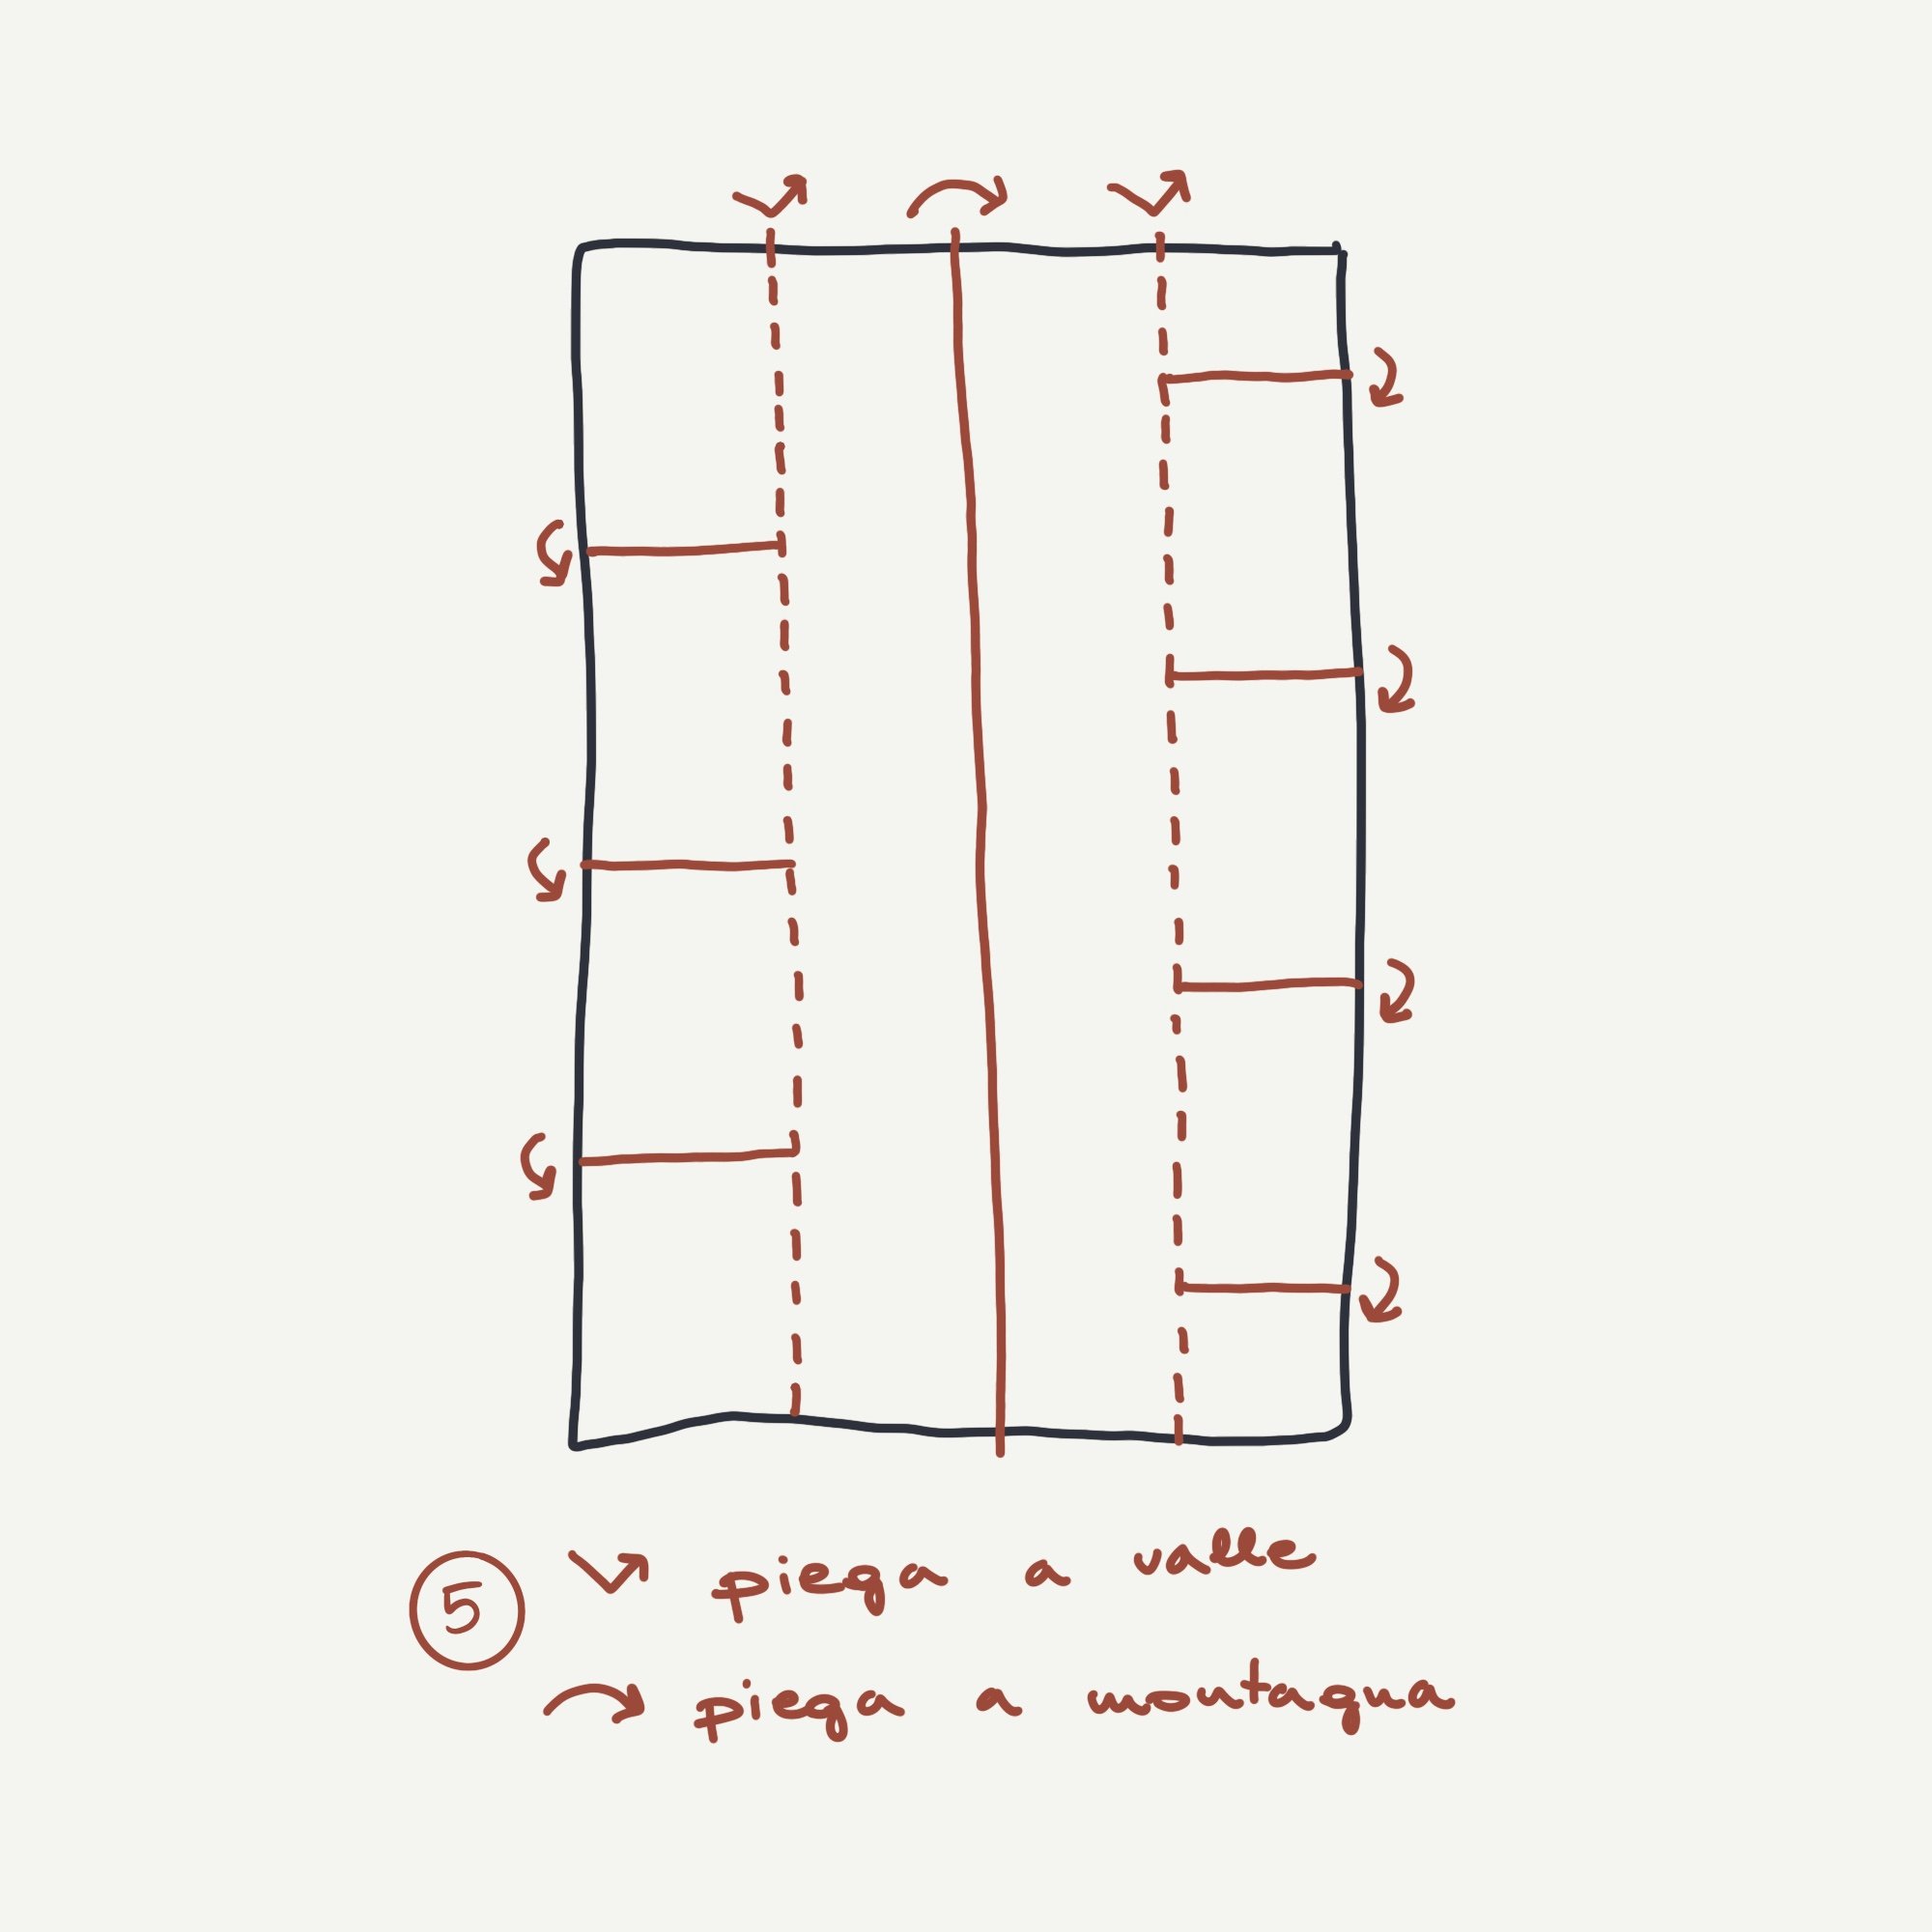
Once the design is finished, it is time to start cutting and folding. Take a pair of scissors or a box cutter and cut along the lines dividing the sections, following Diagram 4. Be careful not to cut all the way to the edge of the paper, as you want to keep the sections connected. Once you have cut along all the lines, unfold the paper and you will see that you have a series of interconnected rectangles.
Now comes the fun part: folding! Take the sheet and fold it in half horizontally, so that the short ends are aligned. Then fold it in half vertically, so that the long ends are aligned. Continue folding the sheet in half, alternating between horizontal and vertical folds, until you have folded it like an accordion. Be sure to press firmly on each fold to create sharp creases.
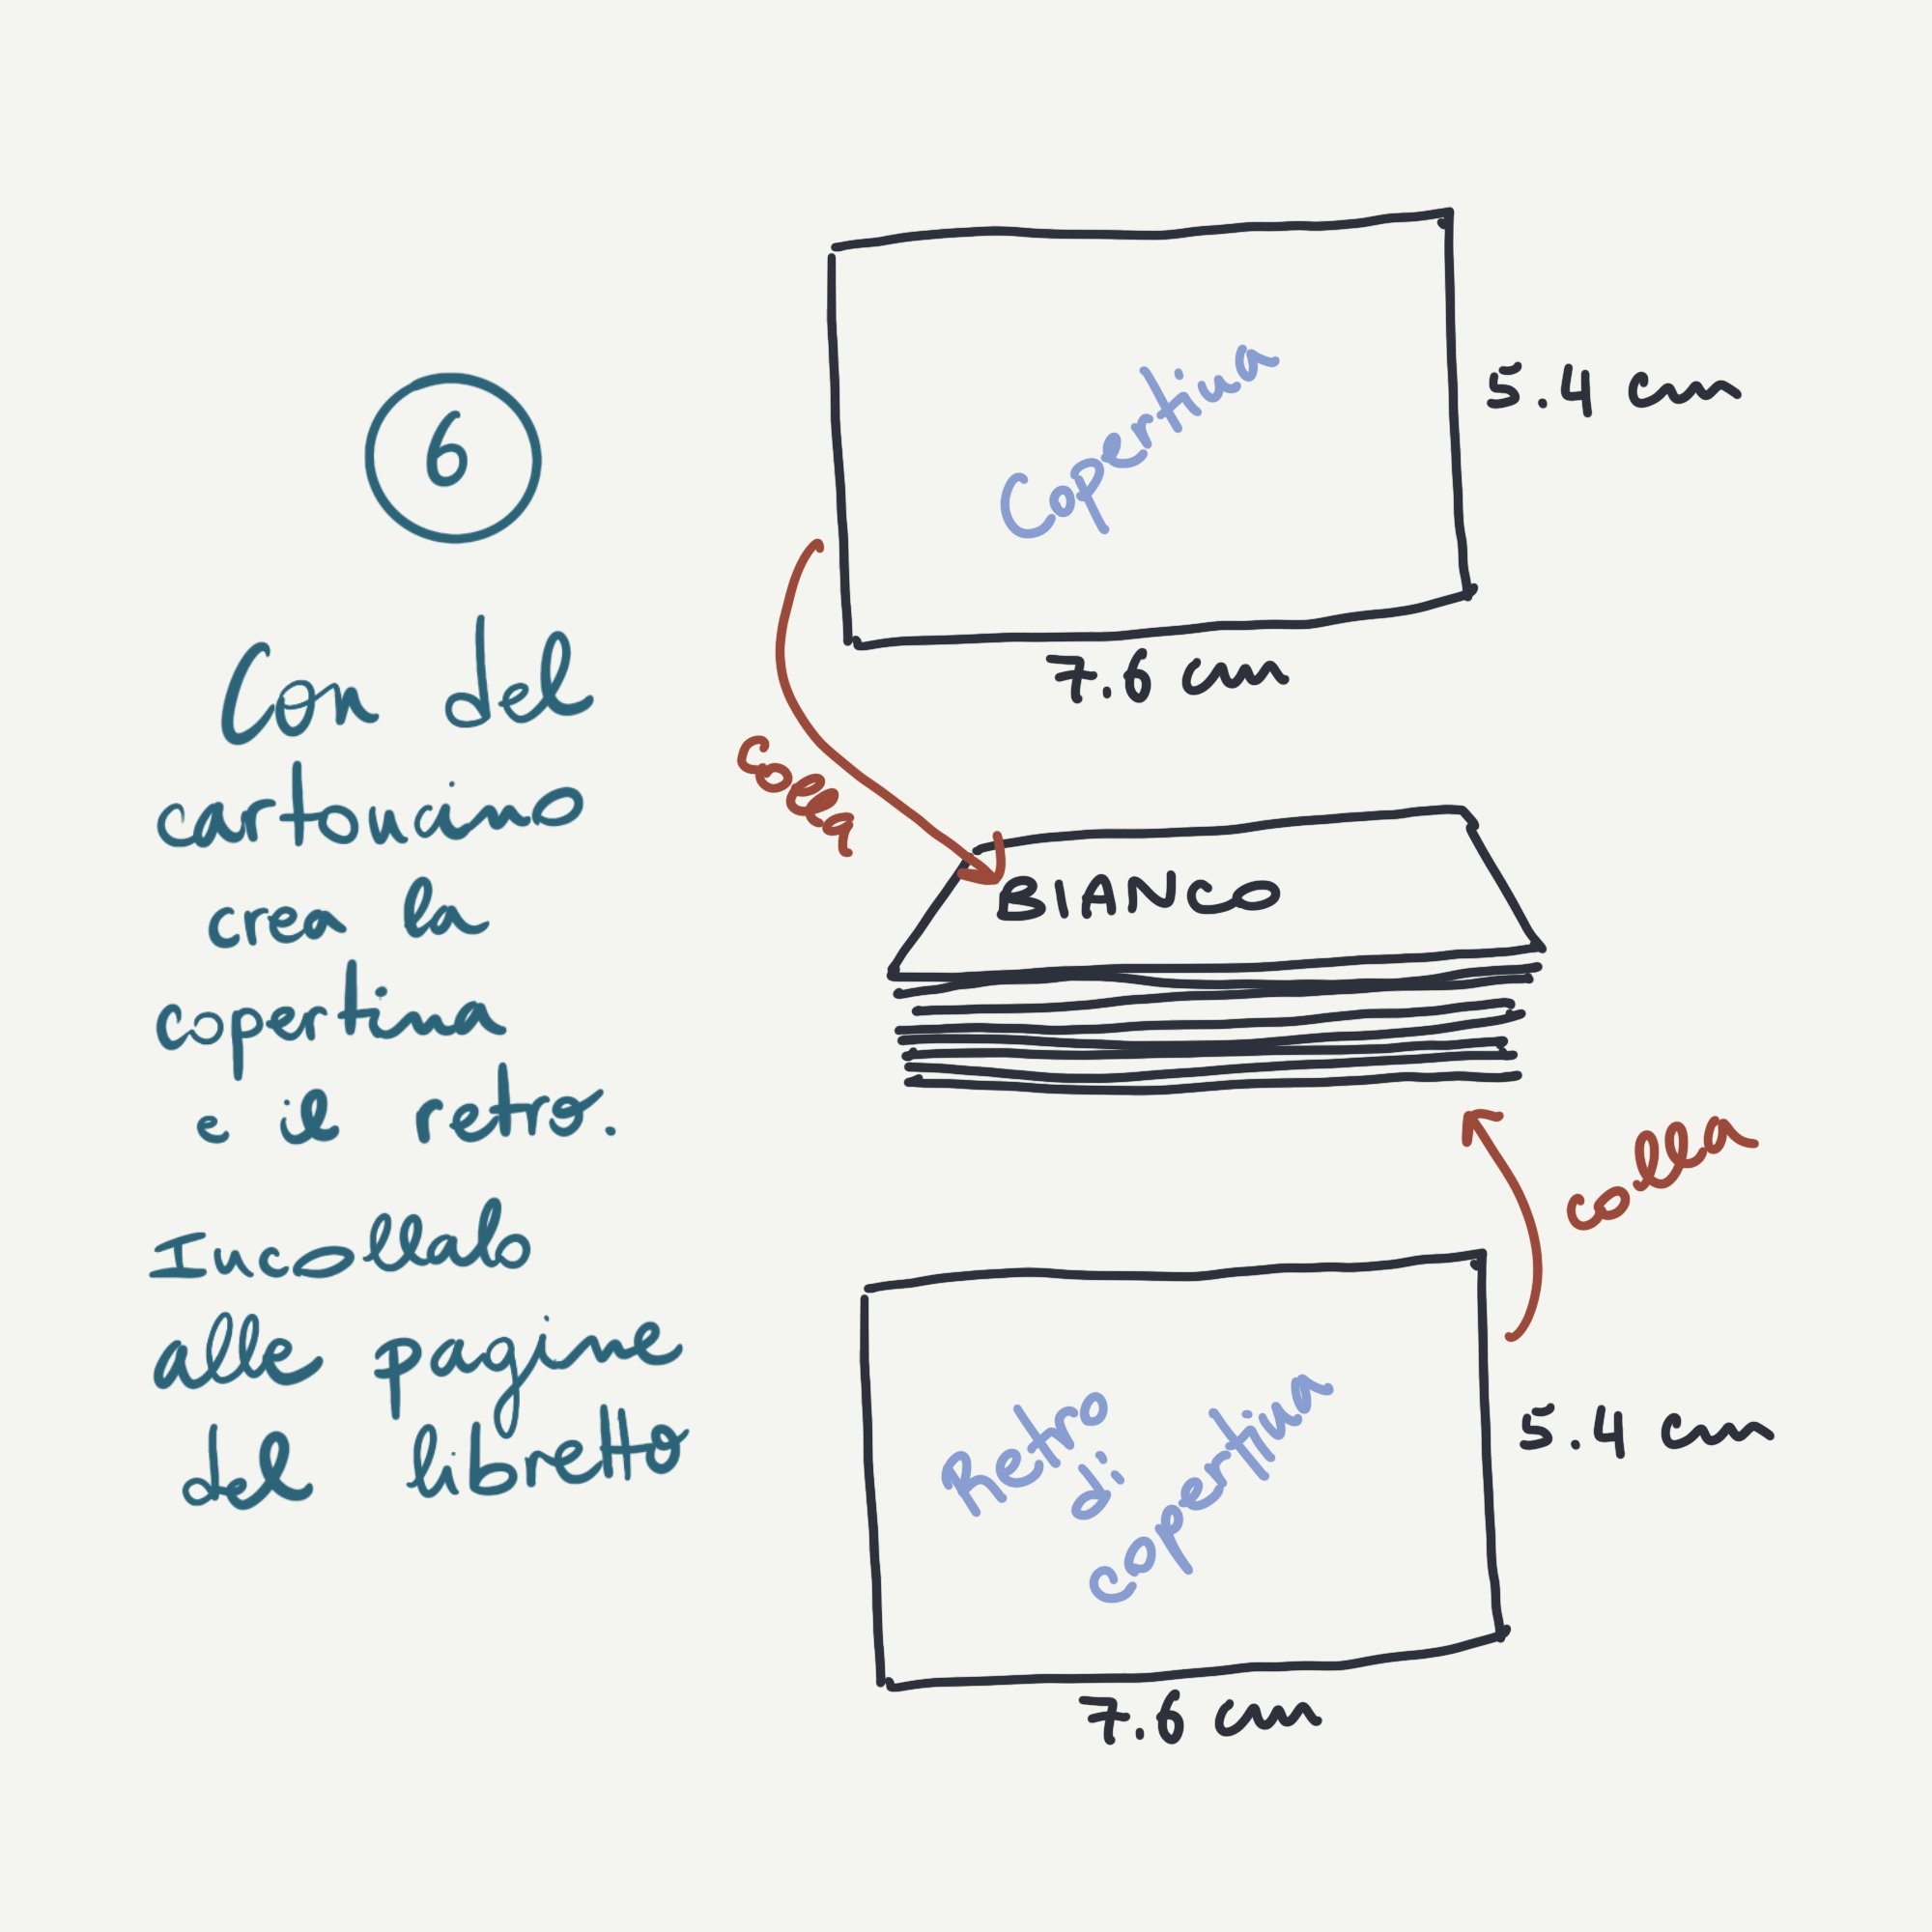
Step 4: Add Cover and Back Cover
To give the book more stability, you now need to add a cover and back cover. Take a piece of cardboard and cut out two 7.6x5.4 cm rectangles, and stick them on the first and last page of the paper accordion you have created.
Step 5: Voila! Your Mini Book is ready
Decorate the cover and back cover as you wish, adding the title of what will be your first mini-book.
Tip: If you prefer, you can do this process by skipping step 2, and thus create an empty mini-book, perfect for writing, drawing or decorating as you like. Let your creativity run wild and make this mini-book truly yours!
Conclusion
Creating a mini book from a single sheet of paper is a simple but rewarding DIY project that anyone, even children, can do. Using just a sheet of A3 paper and some folding and cutting techniques, you can turn a simple piece of paper into a delightful little book.
Whether you use it for notes, doodles or even as a mini diary, this mini book is sure to bring joy and creativity into your life. So grab an A3 sheet, follow the steps in this tutorial and unleash your creativity today!

Commenti